How to use Insights
App Installation & User Guide Manual
1. Build your email report
Add the 'Insights Email' view on your board and click on 'New Report'.
Give your new report a name.


Set the sender of the email report. You will need to connect to an email account in order to do so;
Connect your Gmail account or your Microsoft account to the Insights app in order to send reports from it.

Make sure to allow Insights access to sending emails on your behalf.


Note: You can close the report editor window at any point, your work will be automatically saved and you will be able to continue where you left of.
Choose the recipients of your report.
You can choose members of your Monday account or type any email address.

Note: You can also add CC and BCC in the same way.
Write the general content of your report - fill in the subject section and body of email section.


Note: You can customize rich text design.
Step 1 :
Place the cursor where you'd like the Insight to appear and click on the add Insight button.


Step 2 :
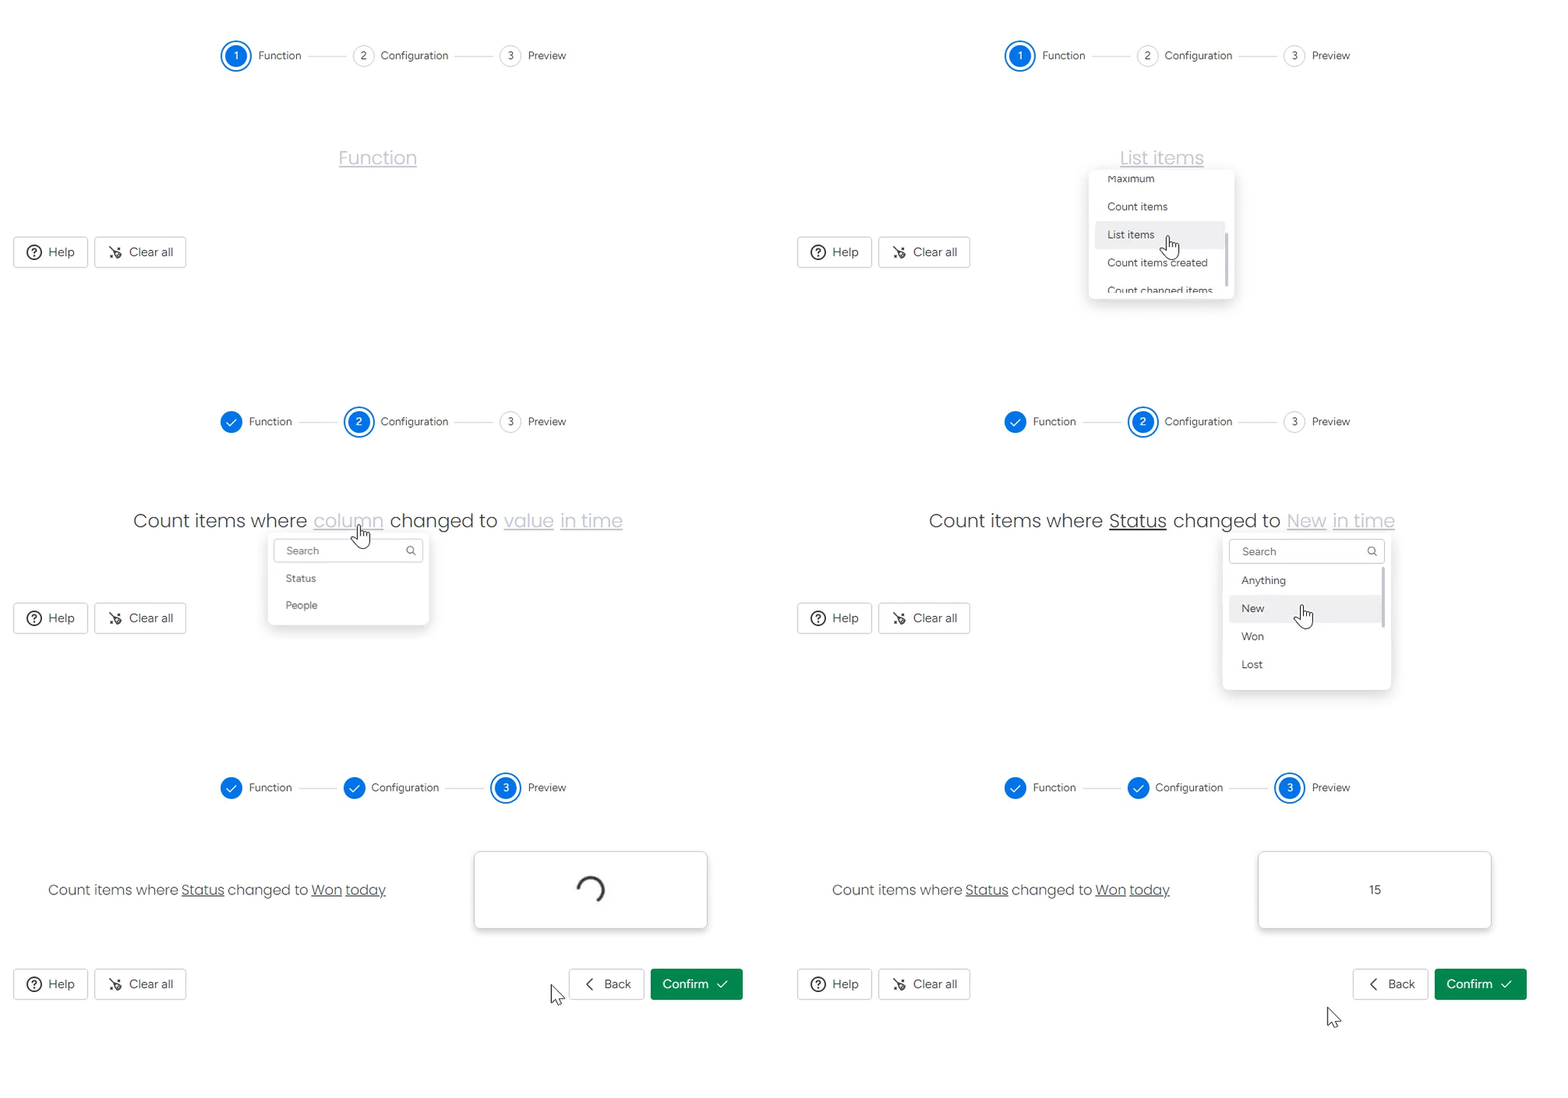
Choose a function. There are 3 types of functions;
Summary functions, List functions and Count functions
Summary
functions
Summary of deals (items)
Example:


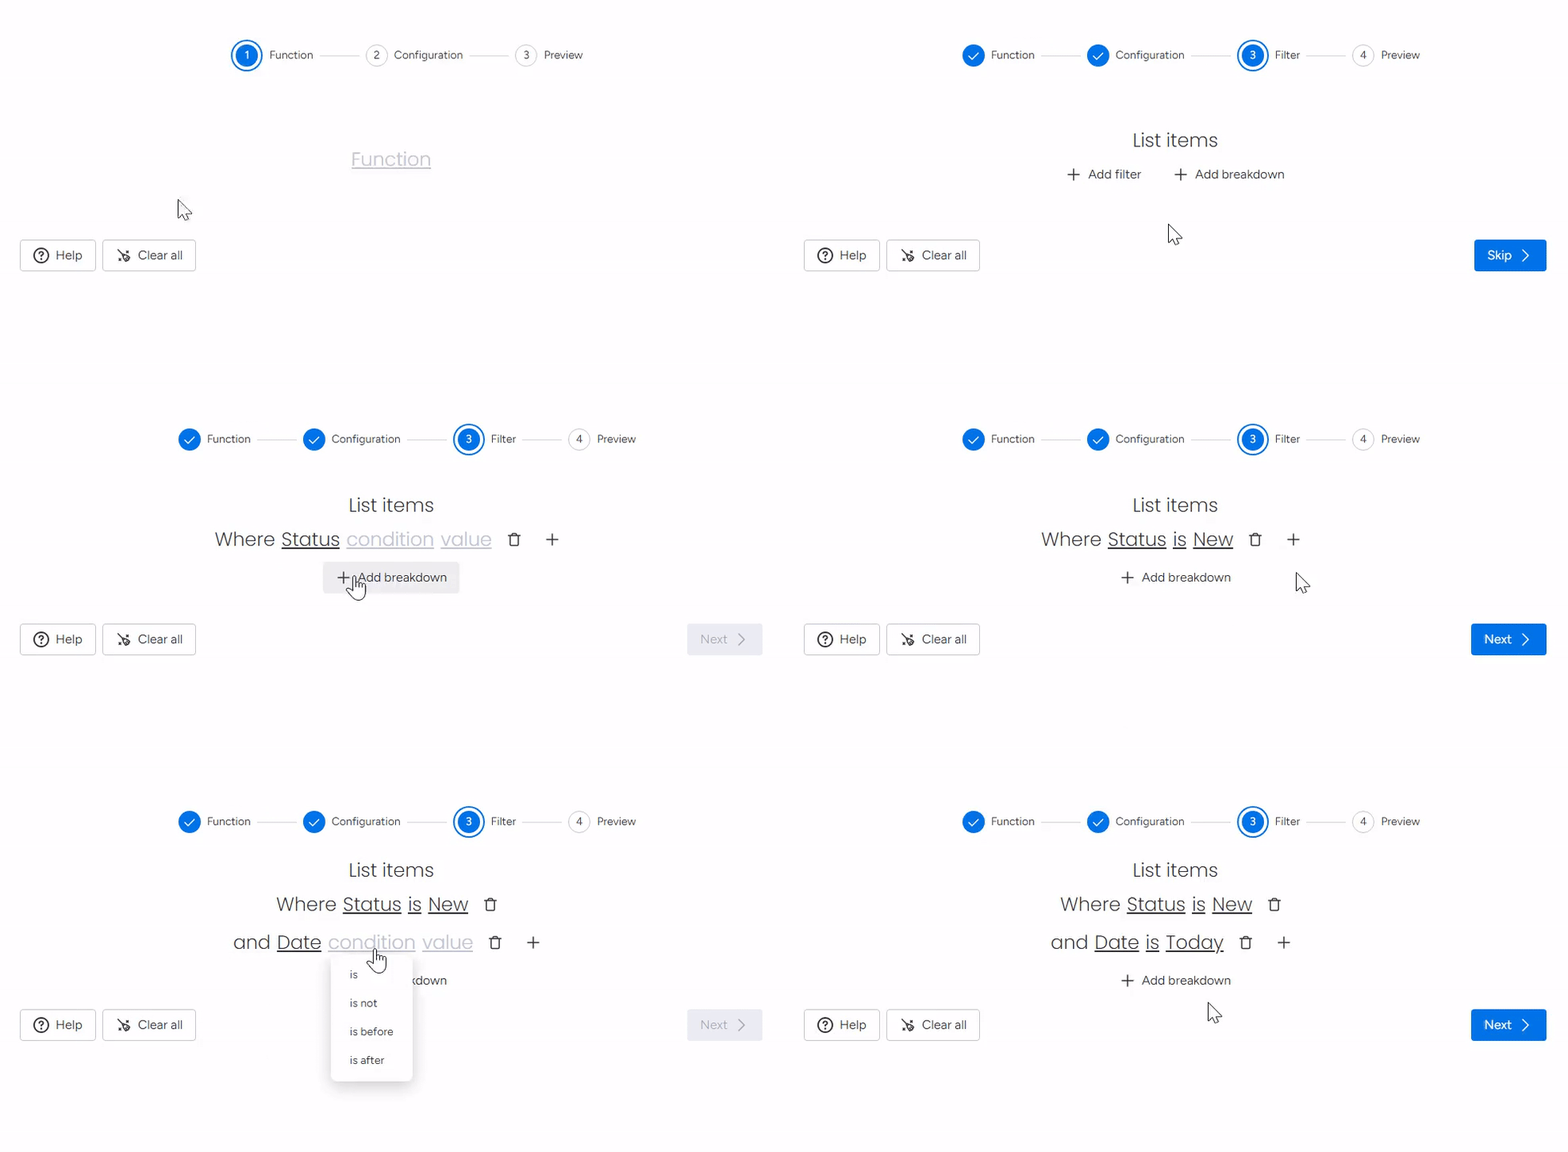
List items where status is new.
Example:
List functions

Count items (deals) where status changed to won today.
Example:
Count
functions

Click each function types to see use cases:
Step 3 :
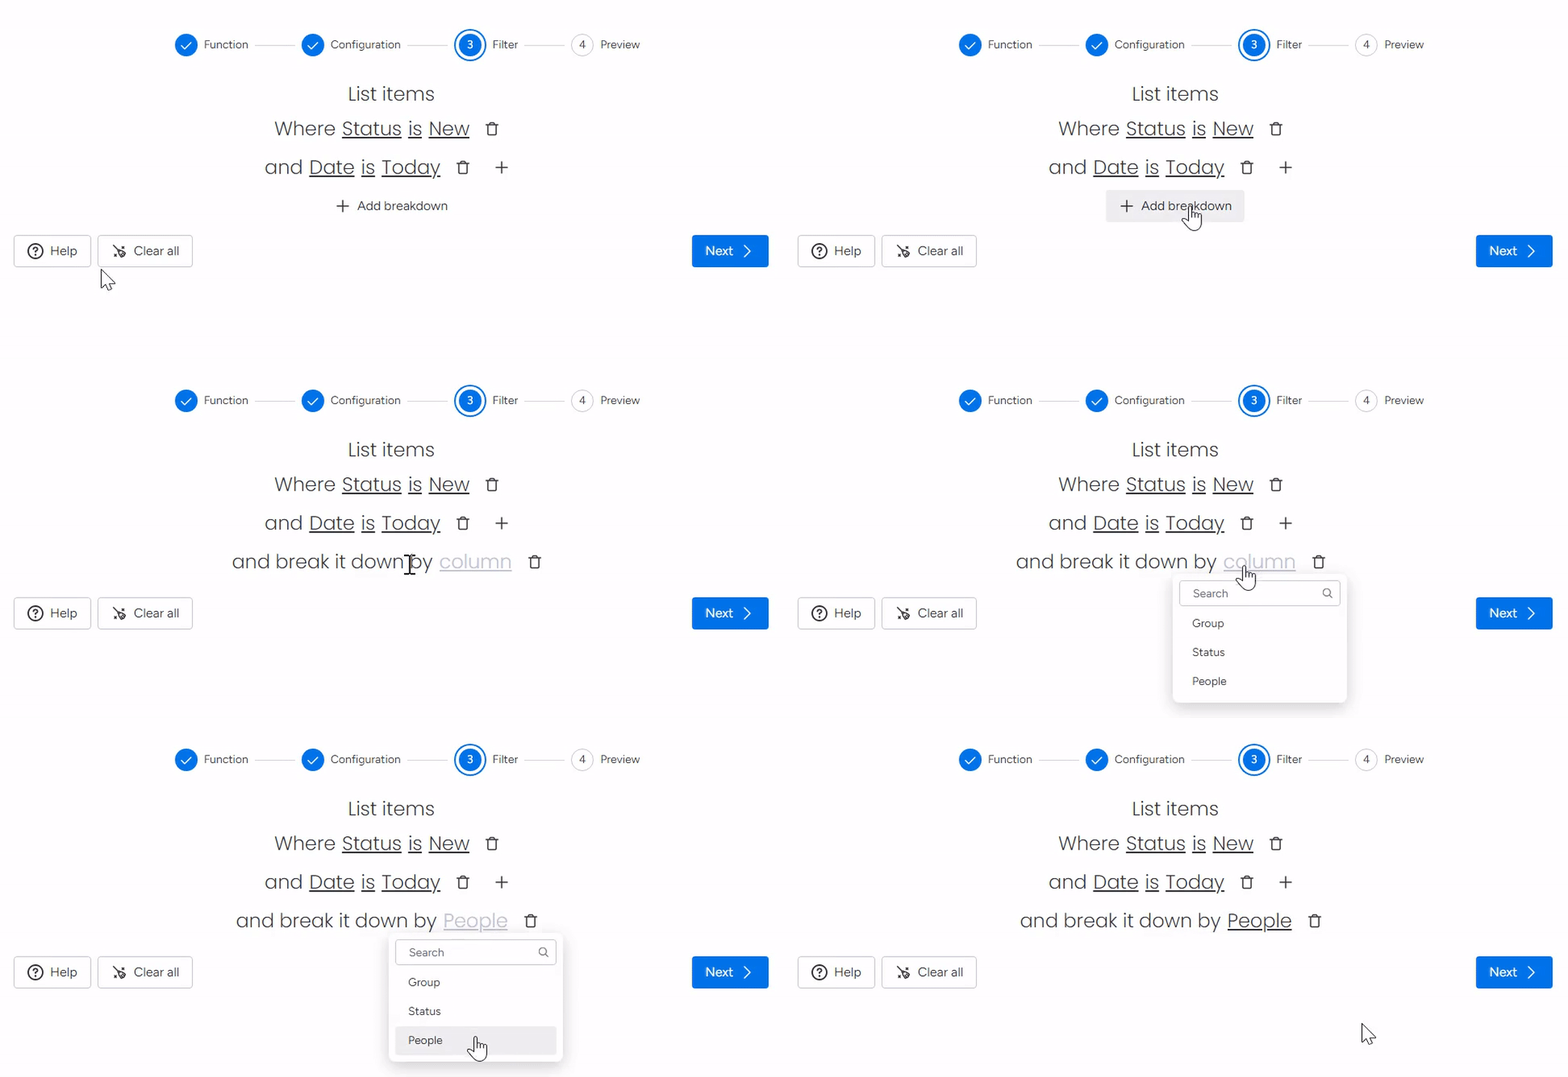
At this point you can choose to filter and/or set breakdowns for your Insight;
Filter by group, status, dropdown, date or people columns.

Note: You can have more than a single filter or no filter at all.
Breakdown by group, status, dropdown and people columns.

Step 4 :
In the preview step you can see the results of your Insight configuration and confirm it.


Ashley Smith -
XYZ Enterprises
DEF Industries
Alpha Solutions Inc.023
John Douglas -
Once confirmed, an Insight will be added to your report wherever the cursor is.
You can add as many Insights as you'd like!


Note: You can design the insight with rich text.
Whenever clicking over the Insight you've added, you will be able to edit, duplicate or delete the insight and change the title that appears in the report editor.

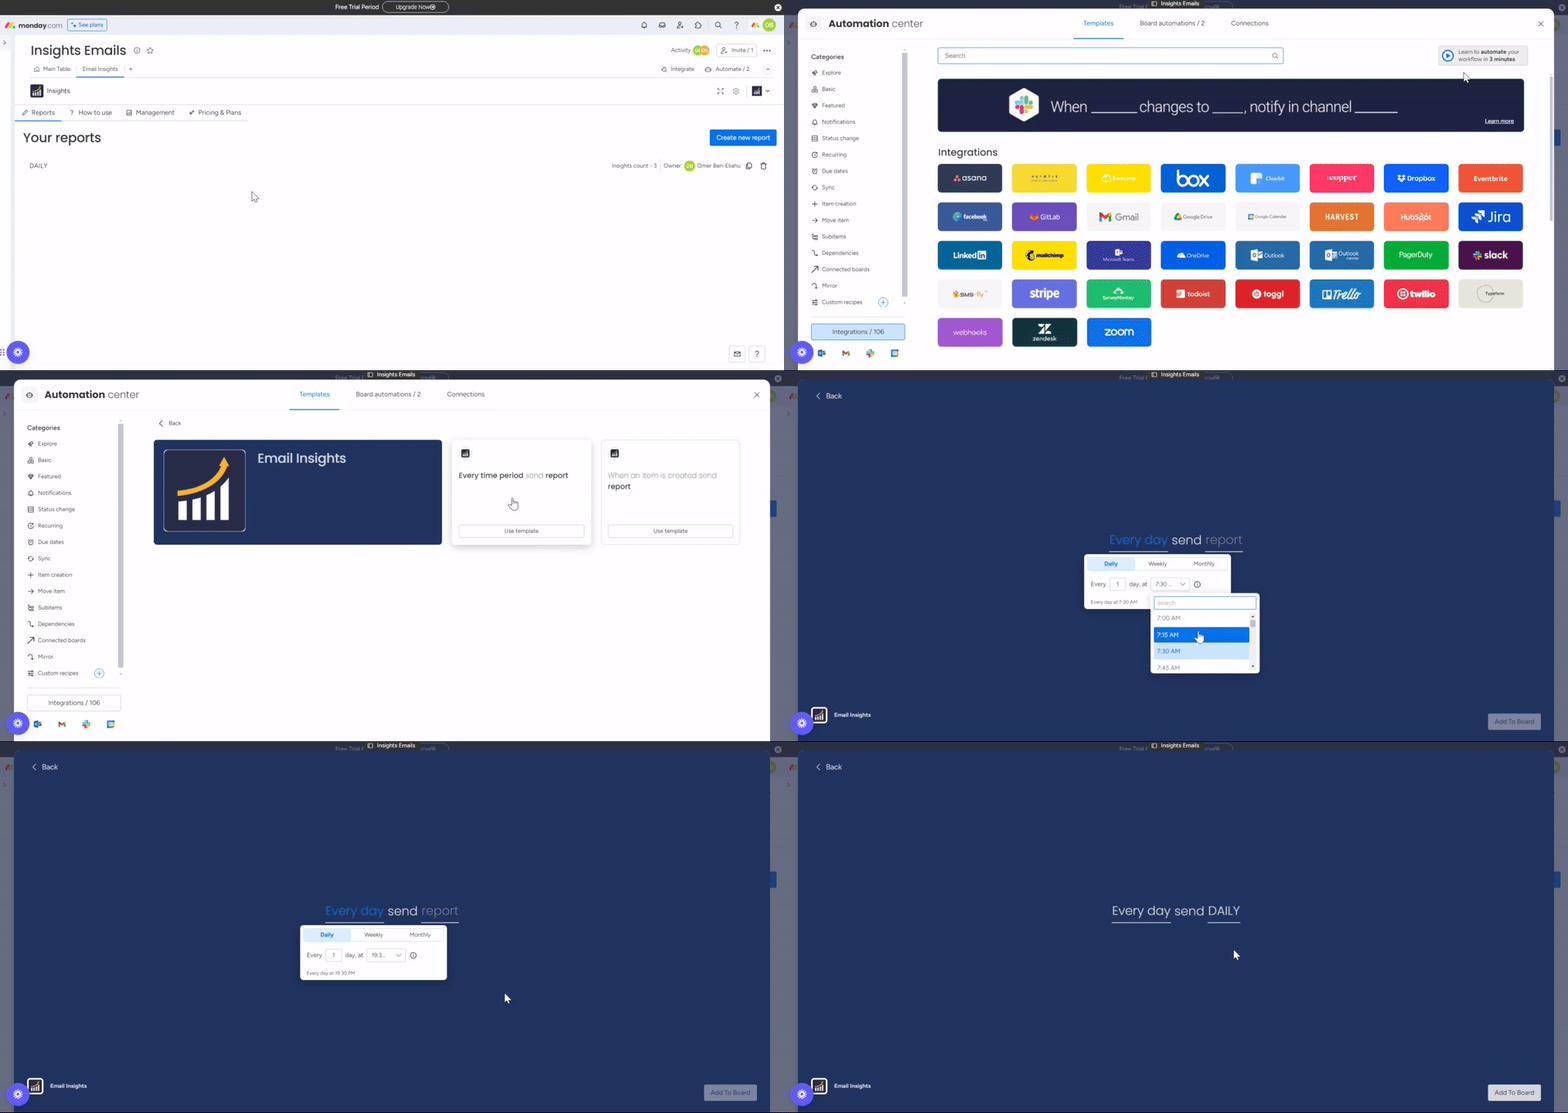
3. Trigger the sending of your Insight report
This is very important - Once your report is done, go to the integration center, search 'Insights Email' and trigger the sending of the report. This is where you choose the time period of sending the report.

This is how the an email report may look

Congrats!
You're all caught up!
Now let Insights work for you and enjoy all your freed-up time
Insights Business Trends tutorial
